Stage 1: Building Your Sensor Node
Completion requirements
Stage 1: Building Your Sensor Node
Assemble the hardware
The hardware for this section, from the reference list above, is as follows:
- 1 x Arduino Uno
- 1 x Dragino Arduino Shield featuring LoRa technology
- 1 x Grove Moisture Sensor by Seeed Studio
- 1 x Grove 4 pin JST to male jumper cable
- 1 x USB-B Male to USB-A Male cable
- 1 x 9V battery
- 1 x Battery clip to barrel jack connector
Assemble the hardware so that you have the Dragino shield on top of the Arduino and the moisture sensor connected to the shield using the JST – male jumper cable. For detailed step-by-step instructions with accompanying photos, refer to the Building a LoRa Device End-to-End with Arduino, Assemble the Arduino Board, Dragino Shield, and Moisture Sensor guide.
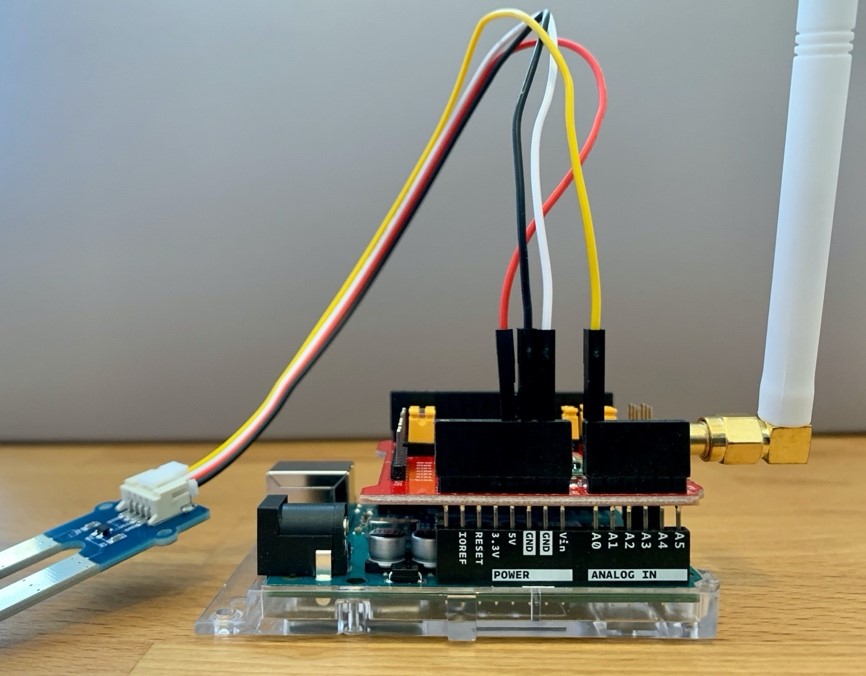
Figure 1: Completed hardware node