Stage 5: Install and Configure ThingsBoard
Configuring ThingsBoard and Chirpstack
Update ThingsBoard Password
- Open the ThingsBoard UI by browsing to
http://THINGSBOARD_IP_ADDRESS:8081, replacing THINGSBOARD_IP_ADDRESS with the IP address of the server running ThingsBoard. - Sign in with the default login username tenant@thingsboard.org and password: tenant.
- Click on the three dots in the top right corner of the screen and choose Security.
- Enter the Current Password, tenant, and enter a new secure password into the password fields.
- Click the Change Password button.
Add Your Device to ThingsBoard
To integrate a device on the network server with ThingsBoard and then display the device data on a dashboard, we must first create a device entry on ThingsBoard for each device. This process will generate an access token for the device which must be added into ChirpStack to authorize the integration.
- Open the ThingsBoard UI by browsing to
http://THINGSBOARD_IP_ADDRESS:8081, replacing THINGSBOARD_IP_ADDRESS with the IP address of the server running ThingsBoard. - Sign in with the default login username tenant@thingsboard.org and password: tenant.
- Click Devices in the side menu.
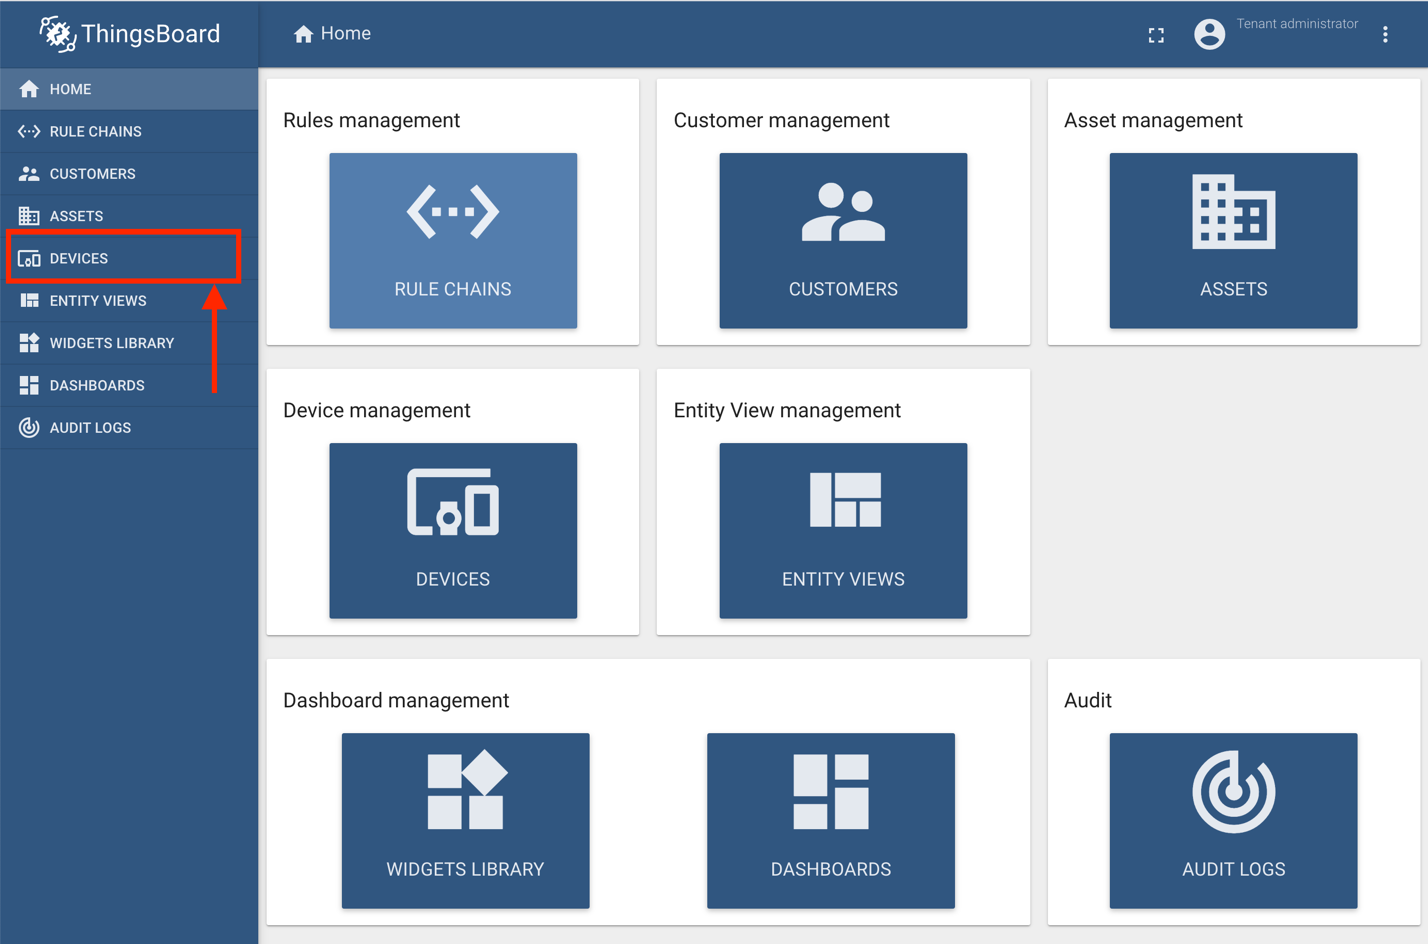
Figure 1: Devices menu item
- You will see some demo devices listed already; you can safely delete these if you wish.
- Click on the + button, and then the Add new device button.
- In the Add new device form which appears, enter a name to uniquely identify this device in the Name field, e.g. Soil Moisture Sensor 1
- Click the Add button in the bottom right corner of the Add new device form.
- The device should be added and appear in the list.
- Click the shield (Manage credentials) icon in the row for your device.
- Copy the Access Token, referred to later as THINGSBOARD_DEVICE_ACCESS_TOKEN.
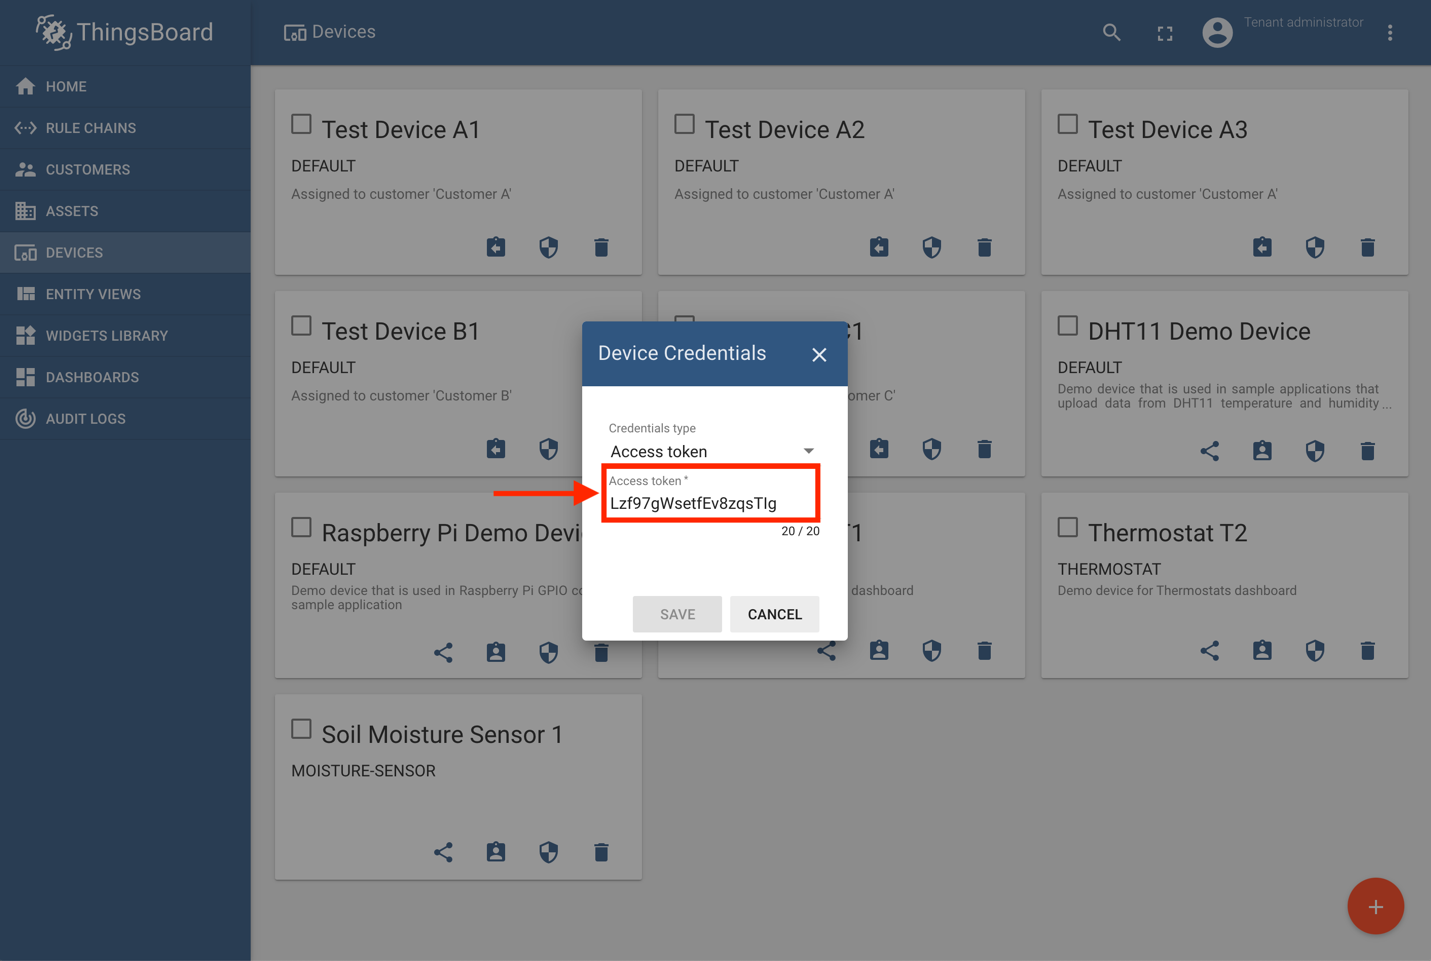
Figure 2: The Access token
Create a New Dashboard in ThingsBoard
The dashboard is where you configure a graphical representation of the device’s current moisture reading. ThingsBoard allows you to build multiple dashboards for your devices with a range of pre-built widgets to choose from.
- Open the ThingsBoard UI by browsing to
http://THINGSBOARD_IP_ADDRESS:8081, replacing THINGSBOARD_IP_ADDRESS with the IP address of the server running ThingsBoard. - Click Dashboards on the side menu.
- Click on the + button, and then Create new dashboard.
- Enter a name for your dashboard into the Title field of the Add Dashboard form, e.g. Moisture Sensor Dashboard.
- Click the Add button.
- The dashboard should be added and appear in the list.
Add a Widget to the ThingsBoard Dashboard
ThingsBoard has a large library of widgets you can add to your dashboard. We will configure a simple digital gauge, ranging from 0 to 1000, to display the moisture reading.
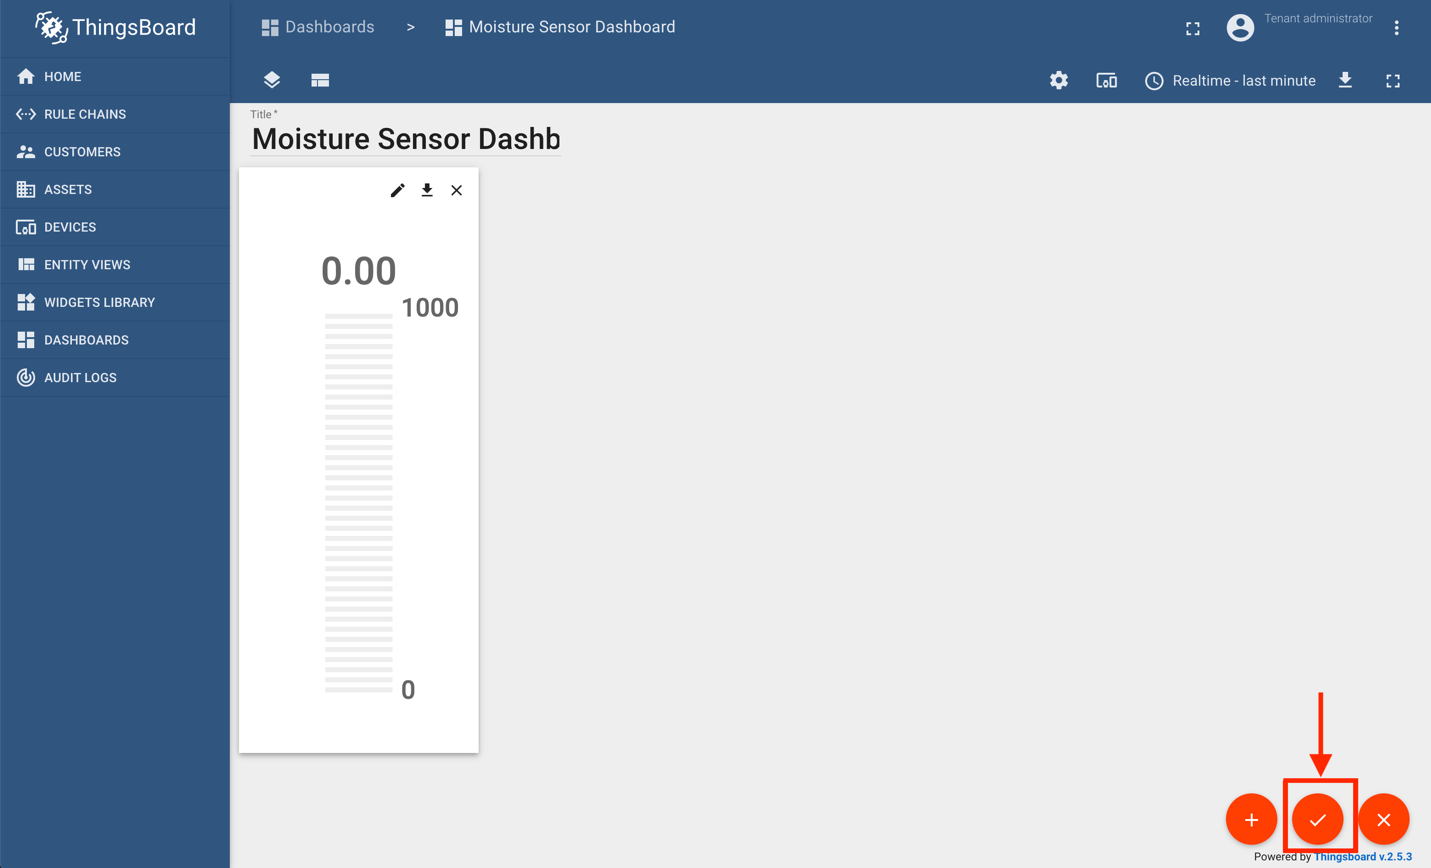
Figure 3: Apply Checkmark icon
- Open the ThingsBoard UI by browsing to
http://THINGSBOARD_IP_ADDRESS:8081, replacing THINGSBOARD_IP_ADDRESS with the IP address of the server running ThingsBoard. - Click on Dashboards in the side menu.
- Click on the new Moisture Sensor Dashboard item in the list.
- Click the Open dashboard button in the pane which opens.
- Click the edit icon in the bottom right of the screen.
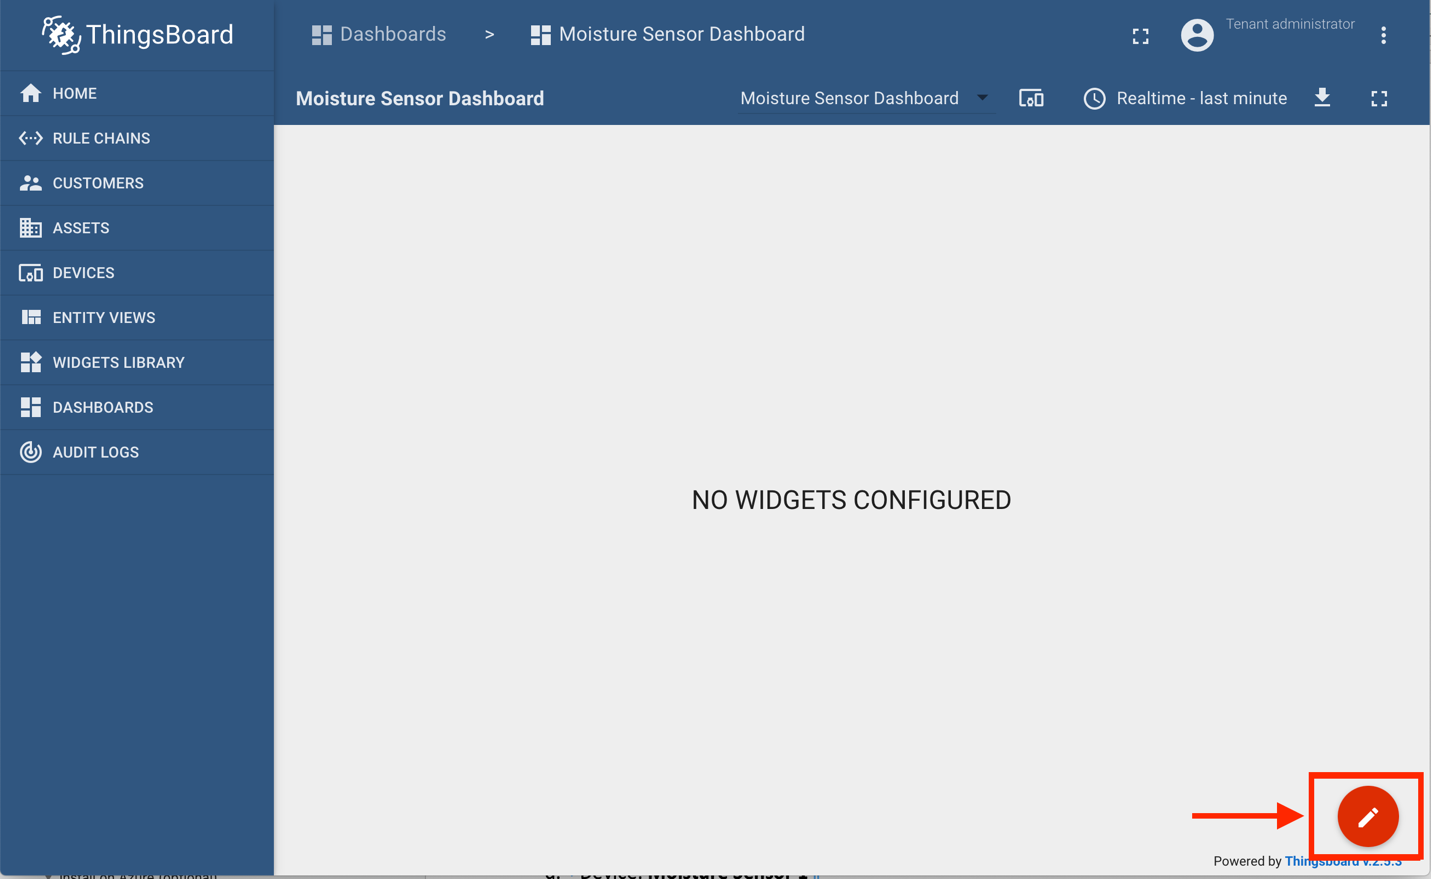
Figure 4: Entering edit mode for the dashboard
- Click the Entity aliases button as shown.
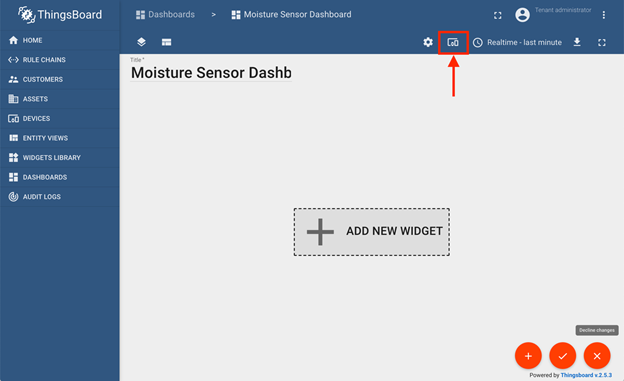
Figure 5: Entity aliases button on the dashboard in edit mode
- Click the Add alias button.
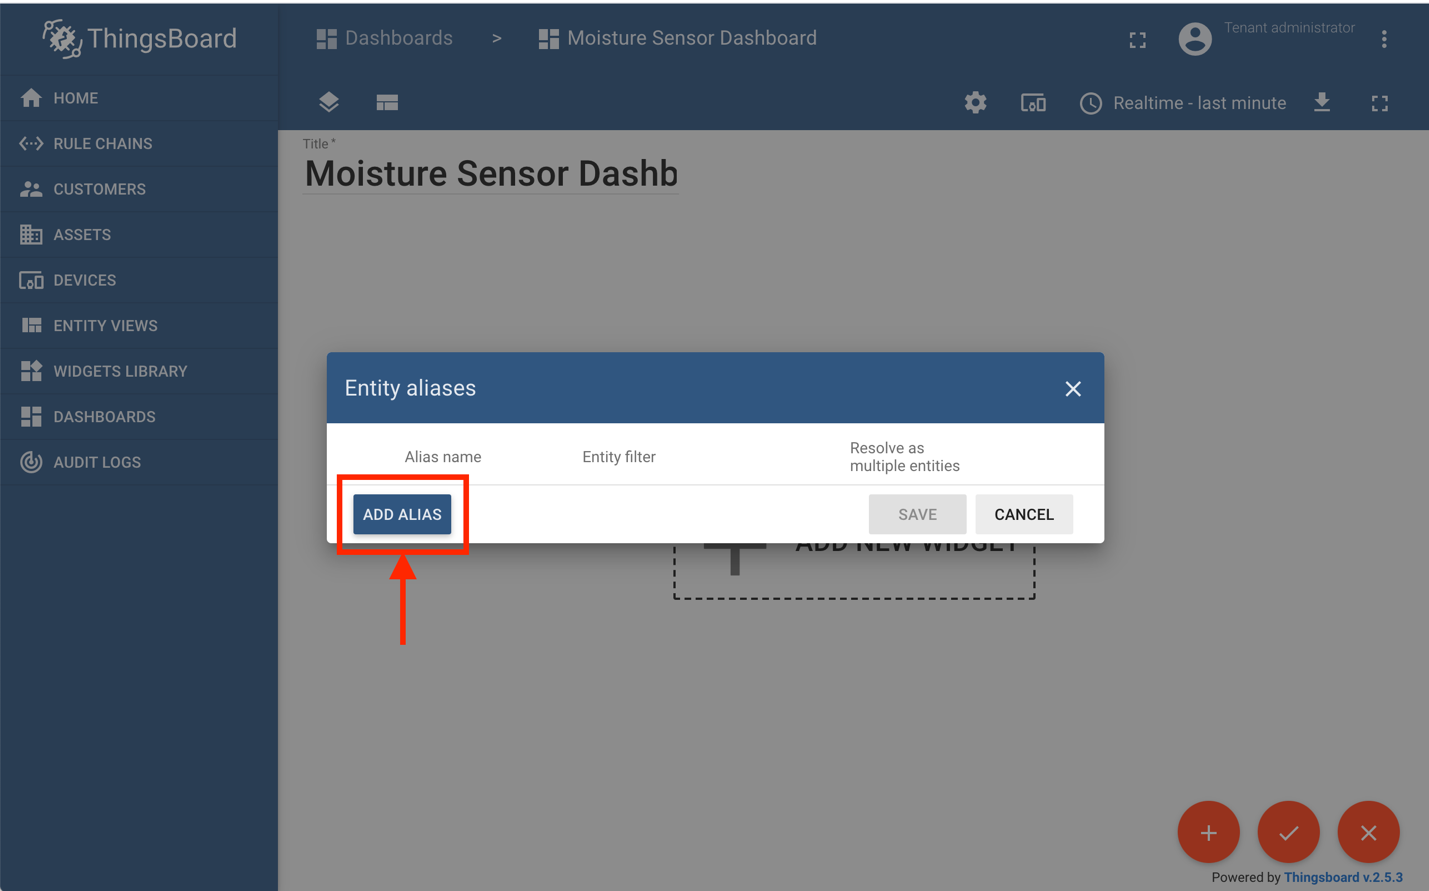
Figure 6: ADD ALIAS button
- Fill out the Add alias form as follows:
- Alias name: Moisture sensor alias.
- Filter type: Single entity.
- Type: Select Device.
- Device: Select the device name created earlier, e.g. Soil Moisture Sensor 1..
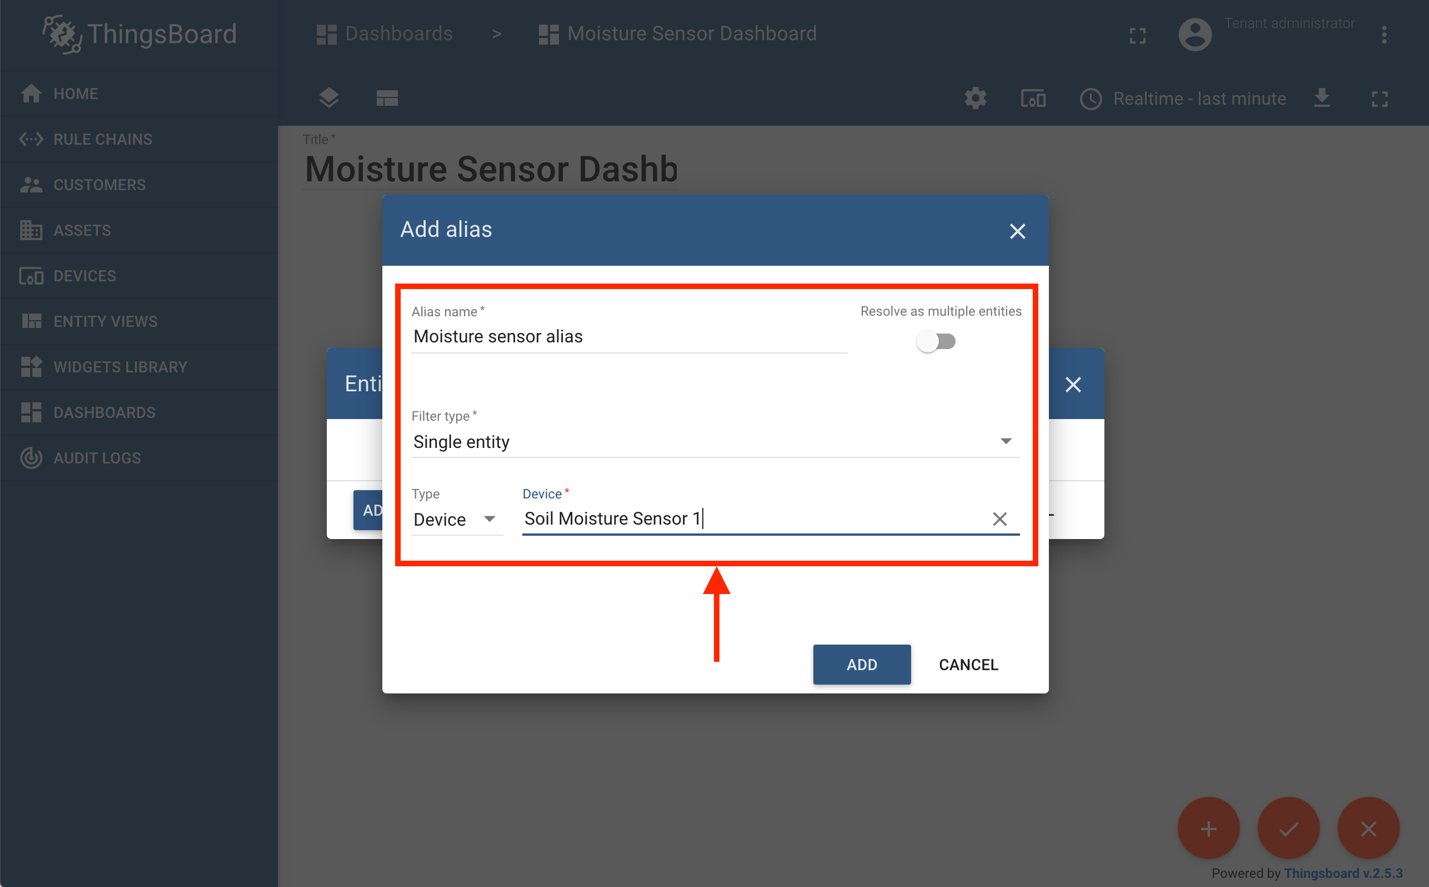
Figure 7: Completed Add alias form
- Click Add in the bottom right corner of the Add alias.
- Click Save in the bottom right corner of the Entity aliases form.
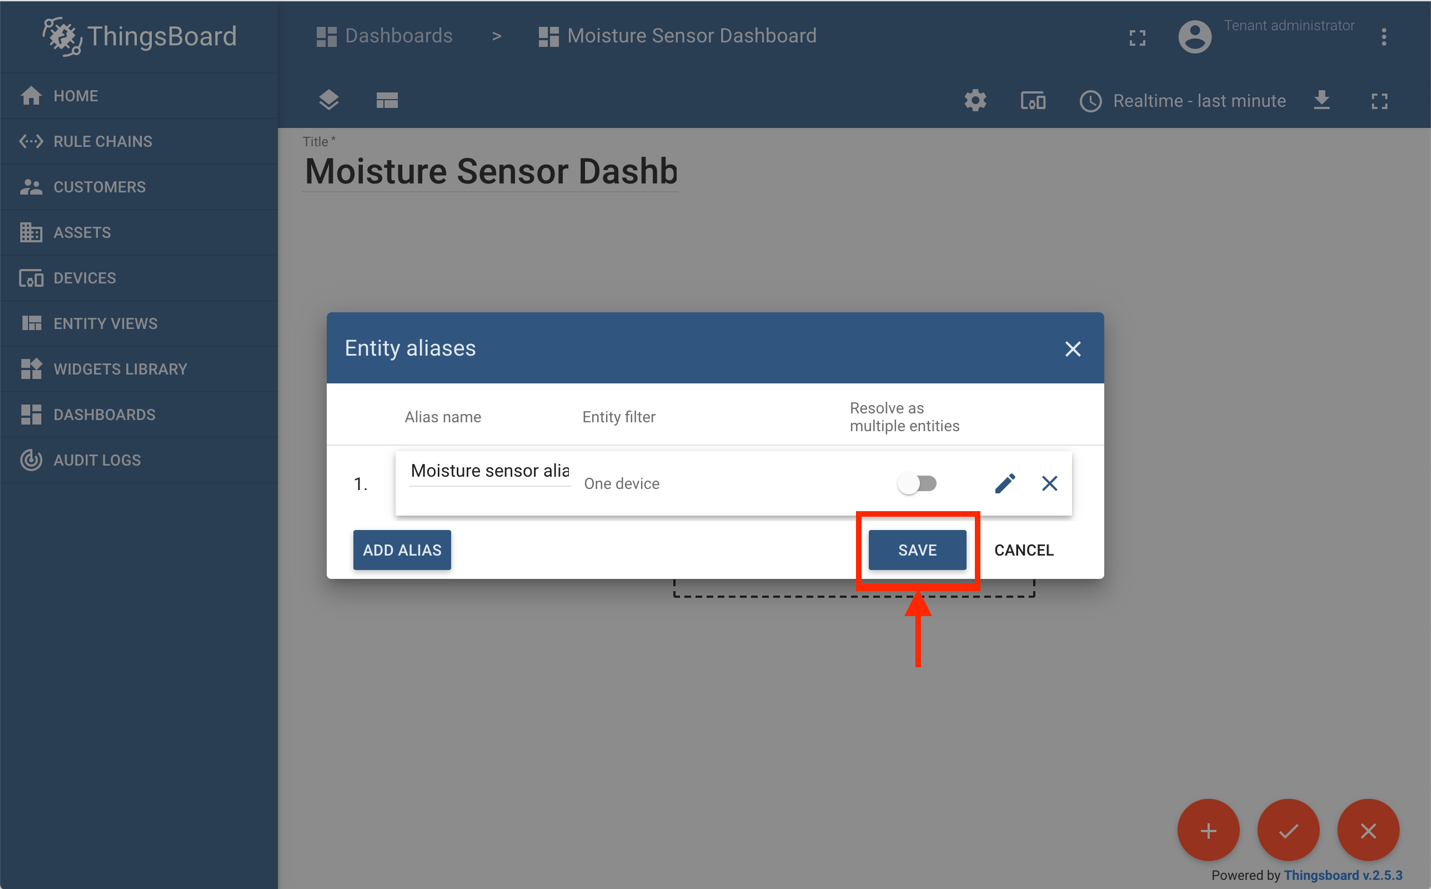
Figure 8: Save button
- Click the + Add new widget button.
- Select the Digital gauges bundle from the Select widgets bundle list, and then click on one of the gauges.
- The Add Widget form opens with the Data tab selected. Click the + Add button.
- In the box which appears, click on the Entity Alias field and select Moisture sensor alias from the drop-down.
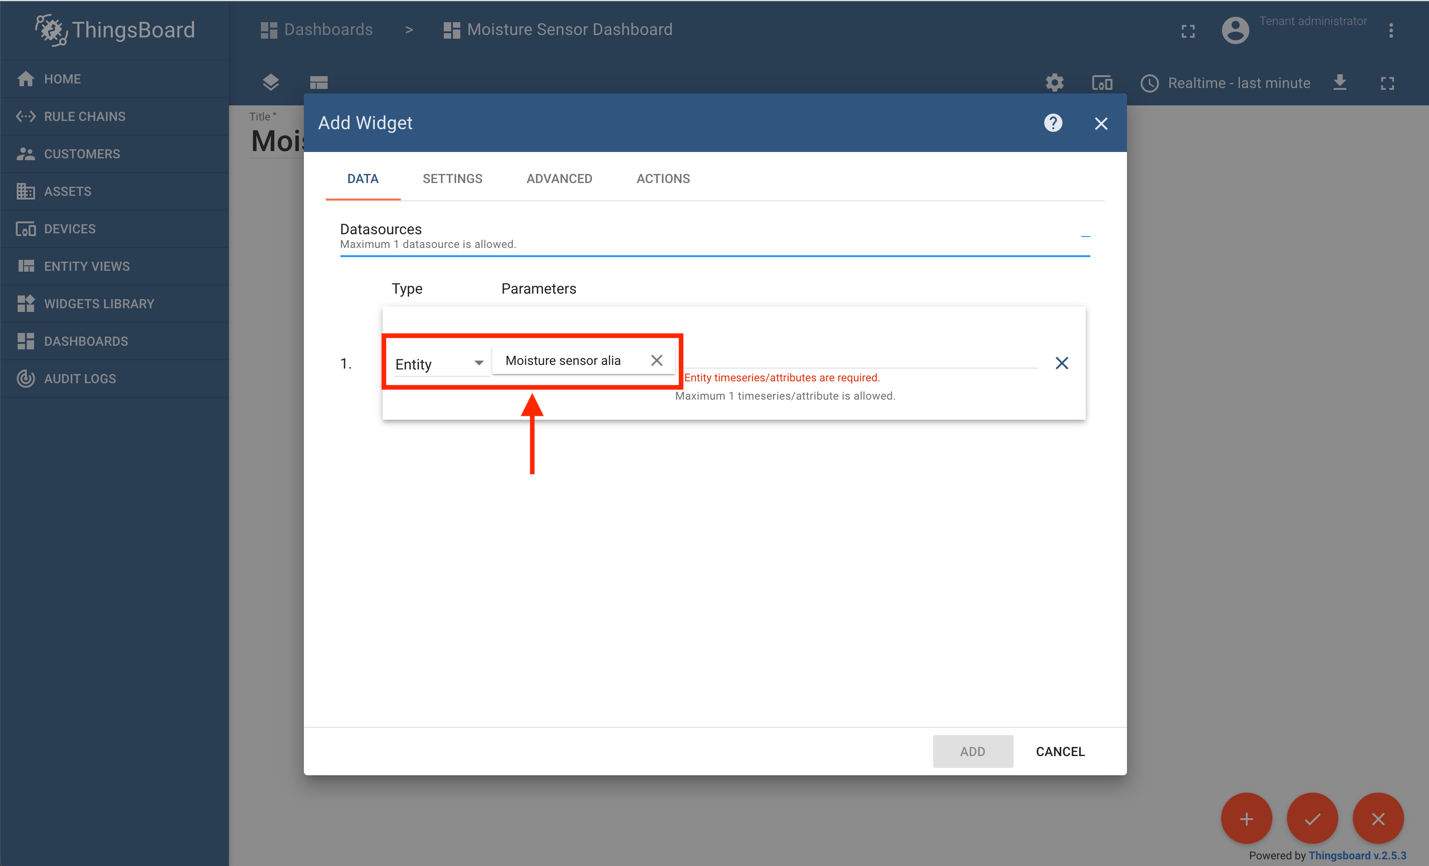
Figure 9: Entity alias field set to Moisture sensor alias in the Add Widget form.
- In the Latest data keys field, the third field from the left, enter: moi, and click the Timeseries icon as shown in Figure 9.
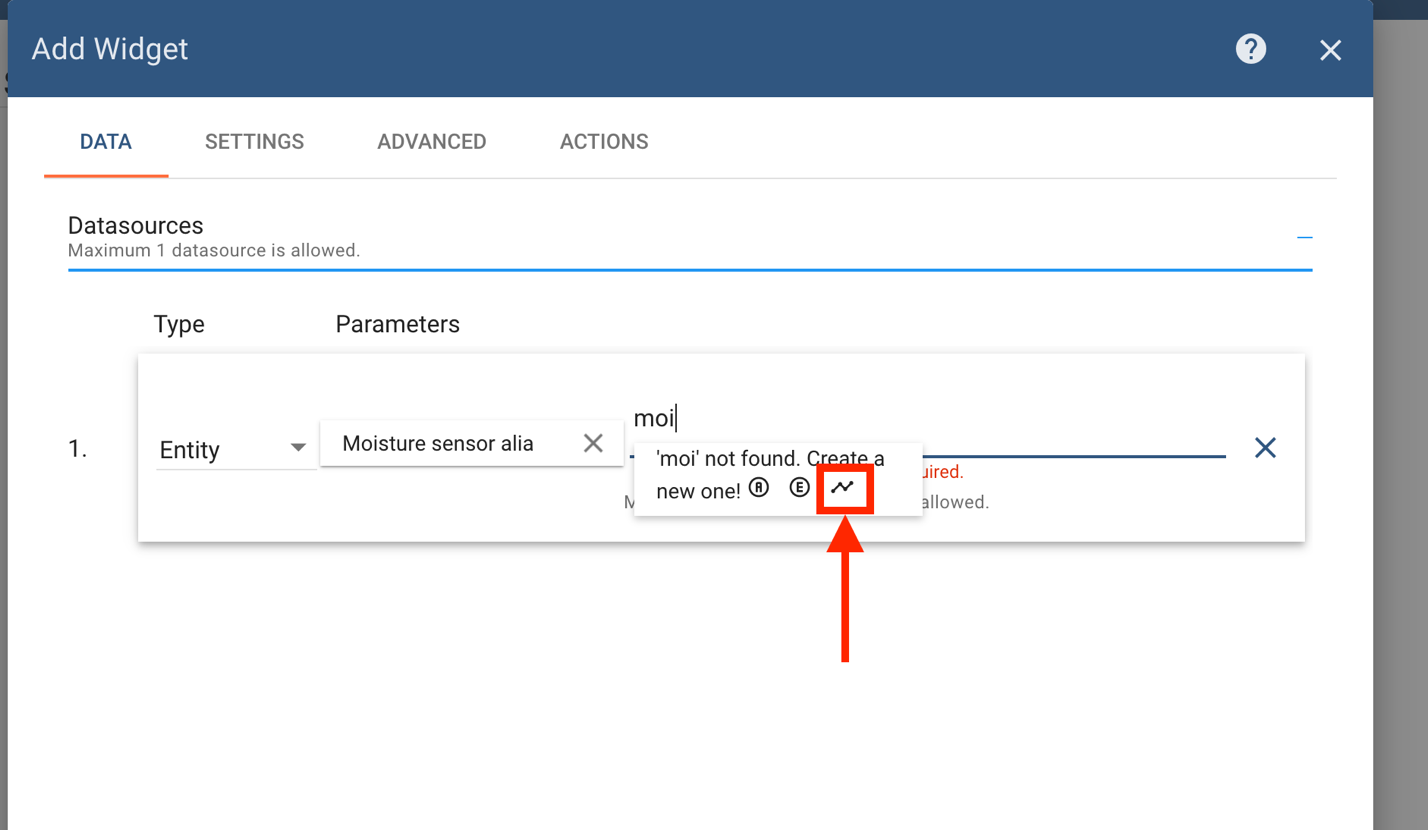
Figure 10: The Timeseries icon.
- Click the Edit icon.
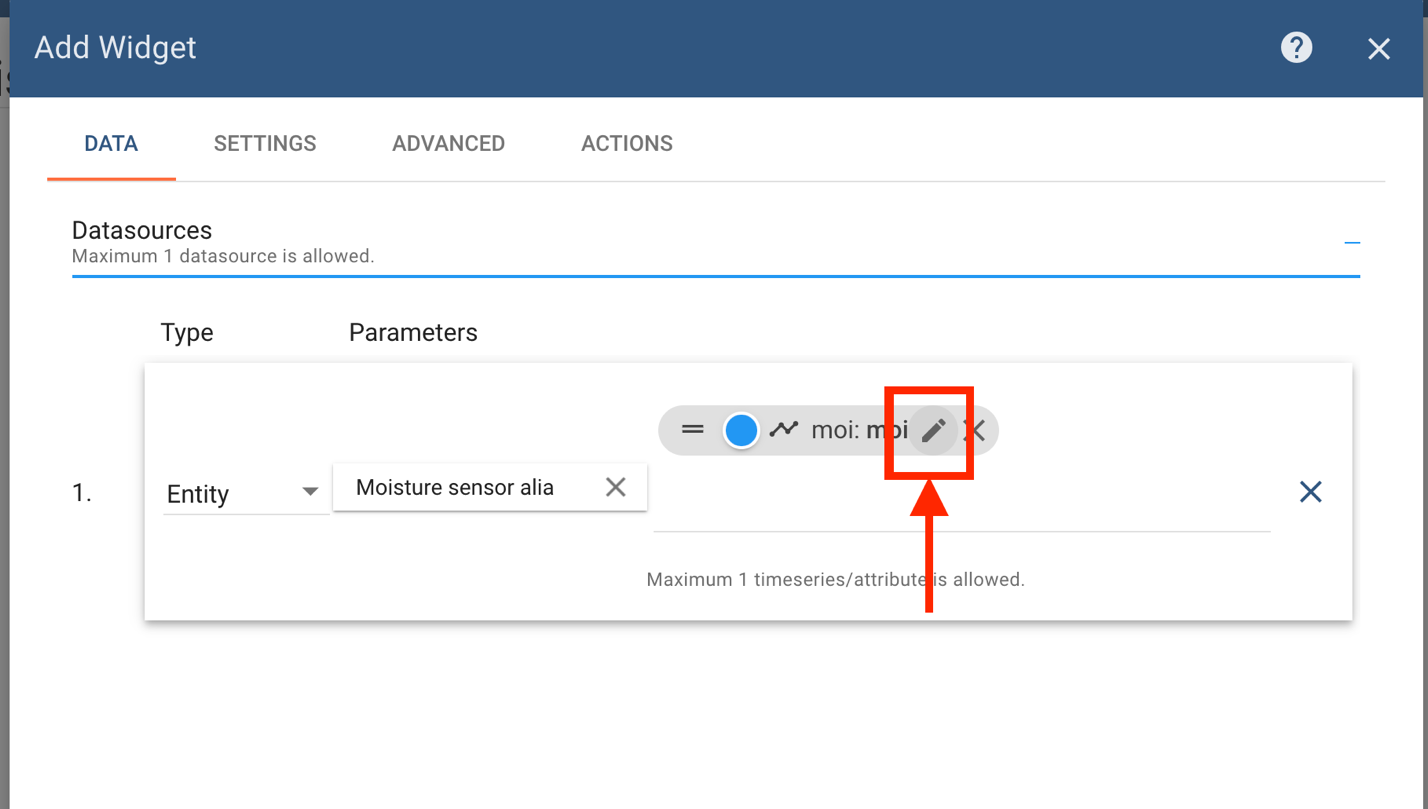
Figure 11: The Edit icon.
- Update the Data key configuration form which appears as follows:
- Key: Enter data_moisture
- Label: Enter Moisture
- Click Save.
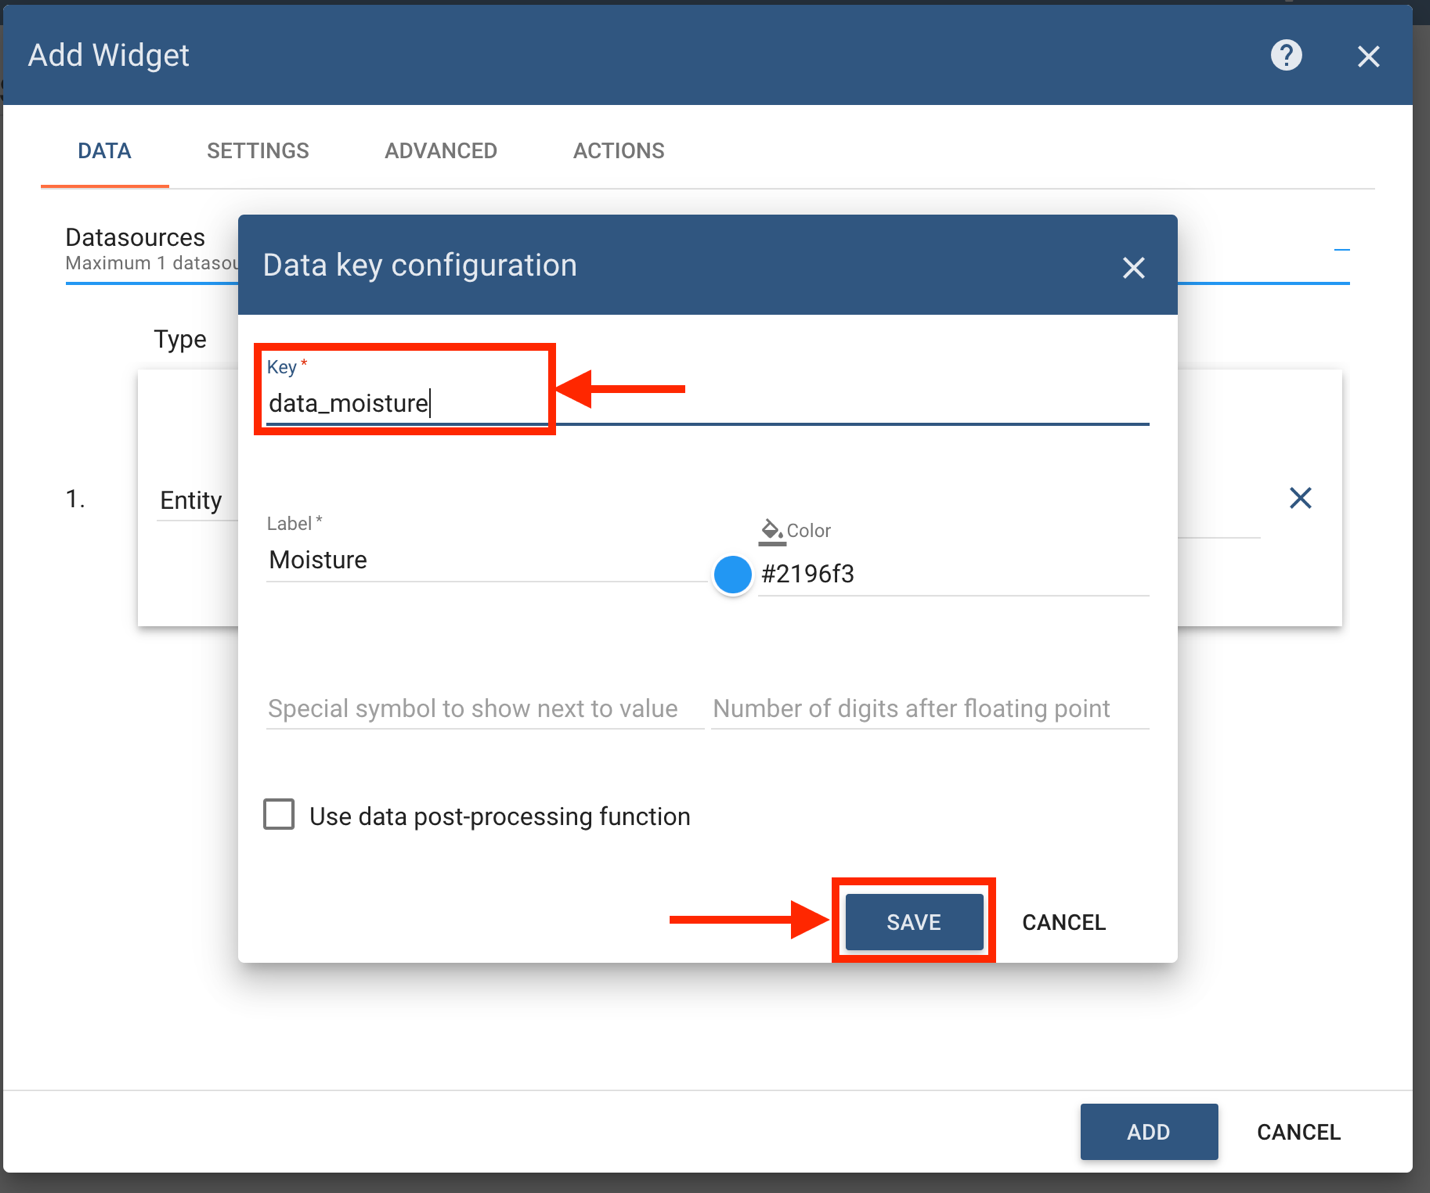
Figure 12: Completed Data key configuration form
- Select the Advanced tab in the Add Widget form.
- Set the Maximum value to 1000, leaving the other fields set to their defaults.

Figure 13: Entering the maximum value
- Click the Add button in the bottom right hand corner of the Add Widget form.
- The widget appears on the dashboard. You can drag the bottom-right corner of the widget to increase the size if you wish.
- Click the Apply (checkmark) icon to apply your changes to the dashboard.
You now have a dashboard with a gauge widget which will display the moisture reading of the end node.
Add ThingsBoard to the ChirpStack Application
-
Open the UI of your ChirpStack network server by browsing to
http://CHIRPSTACK_IP_ADDRESS:8080/, where CHIRPSTACK_IP_ADDRESS is the IP address of your ChirpStack installation. -
Click Applications in the menu on the left.
-
Click the link to your application.
-
Select the Integrations tab.
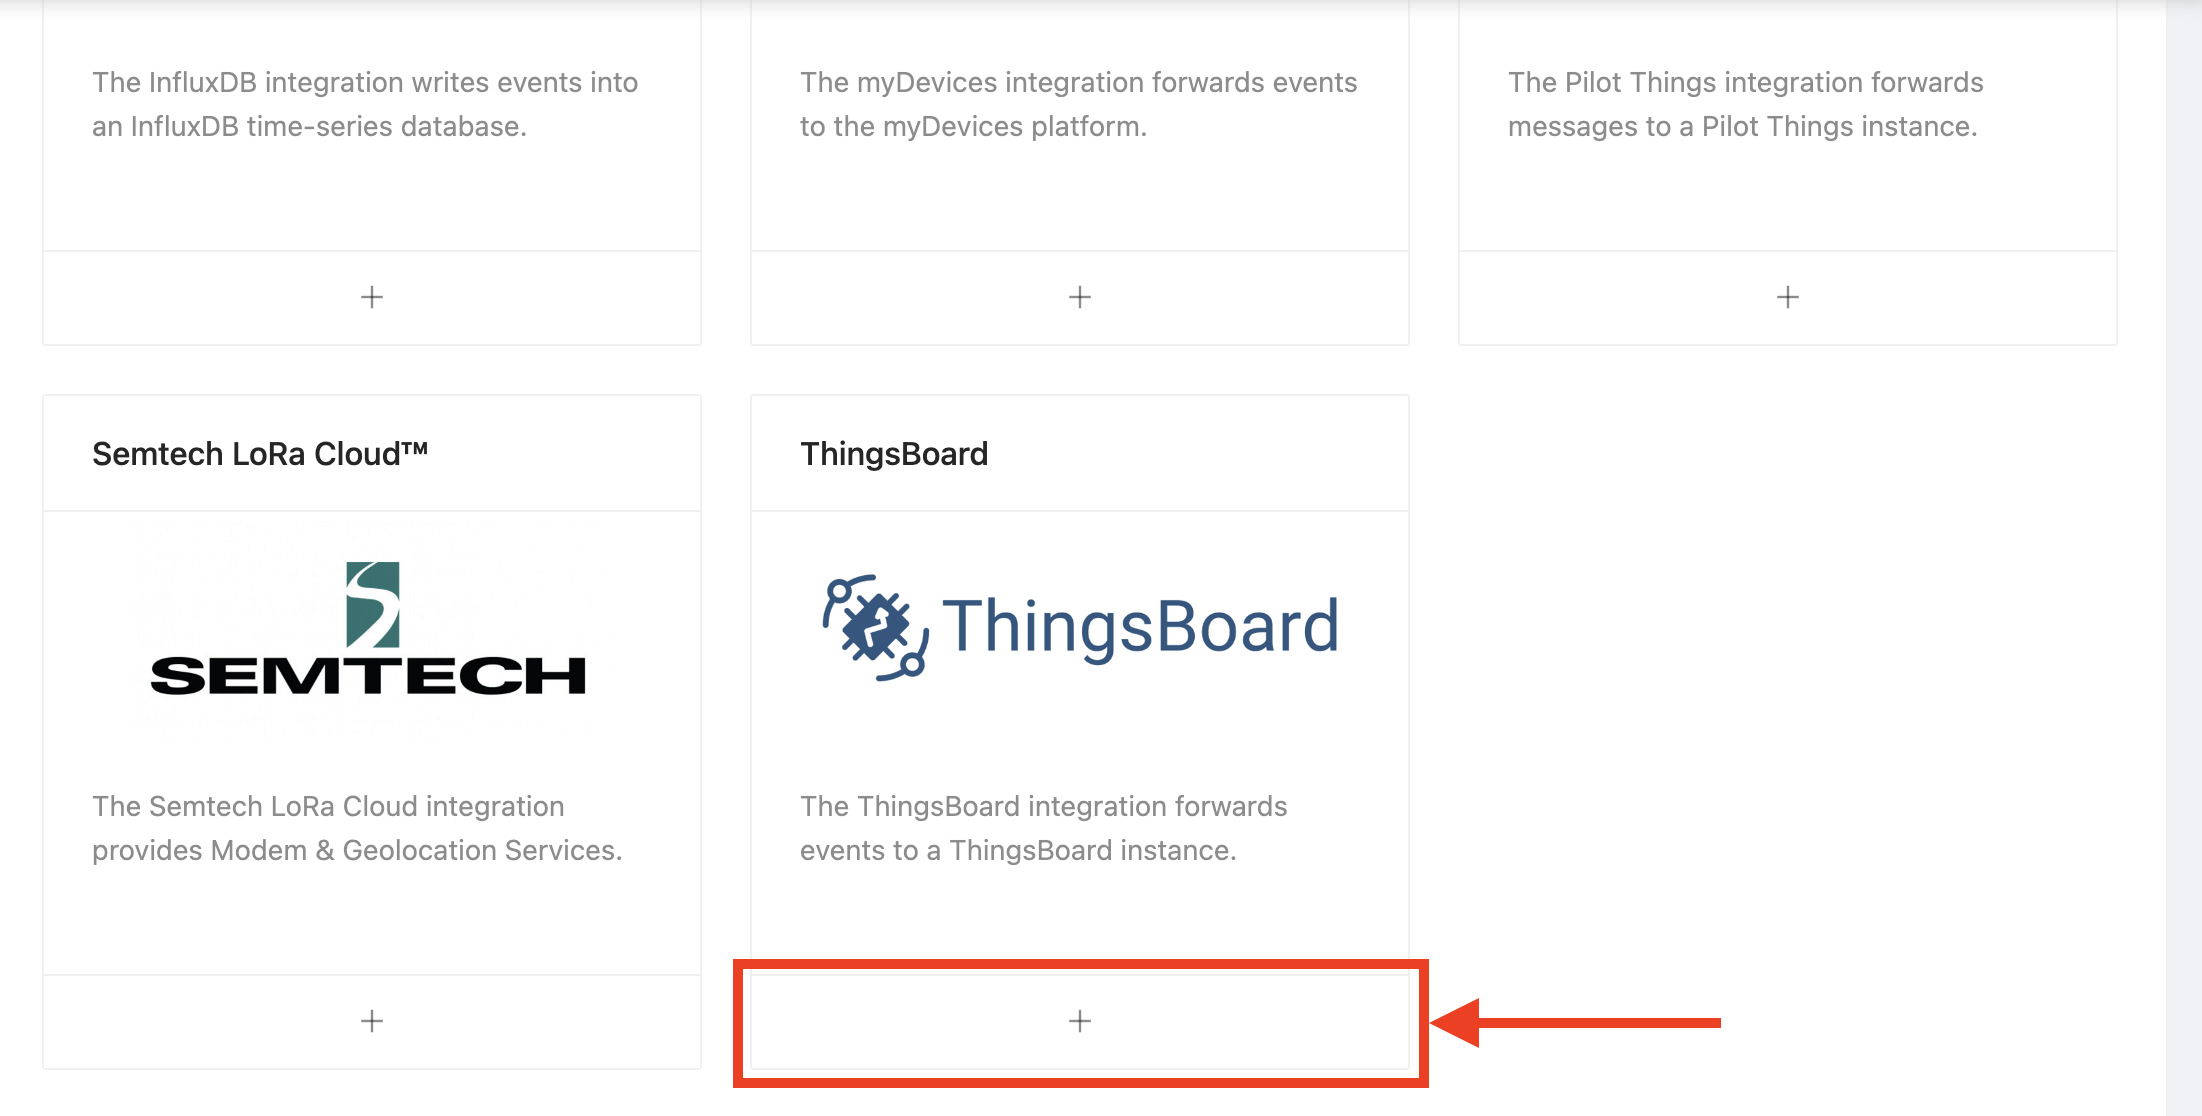
Figure 14
-
Click the ‘plus’ + button inside the ThingsBoard tile. You may need to scroll down to find this option.
-
In the Add ThingsBoard integration form that appears, enter http://THINGSBOARD_IP_ADDRESS:8081 into the ThingsBoard server field, where THINGSBOARD_IP_ADDRESS is the IP address of your ThingsBoard installation.
Warning
If you installed ThingsBoard and ChirpStack on the same machine, enter the IP address of your machine on the local network as the THINGSBOARD_IP_ADDRESS. Do not enter localhost, 127.0.0.1, or 0.0.0.0, because these instruct ChirpStack to communicate with its own Docker container, and ThingsBoard is running in a separate Docker container.
-
Click the Submit button to add the integration.
Add ThingsBoard Access Token to the Device in ChirpStack
This section explains how to add the THINGSBOARD_DEVICE_ACCESS_TOKEN you saved in the previous section as a variable on the device object in the Semtech Network Server. This variable is passed through to the integrations, along with the device messages. When the ThingsBoard integration is enabled in the next section, the device access token allows ThingsBoard to trust your device.
-
Open the UI of your ChirpStack network server by browsing to
http://CHIRPSTACK_IP_ADDRESS:8080/, where CHIRPSTACK_IP_ADDRESS is the IP address of your ChirpStack installation. -
Open the device page by clicking Applications in the menu on the left, clicking on the link to your application, and clicking the link to your device in the DevEUI field.
-
Select the Configuration tab.
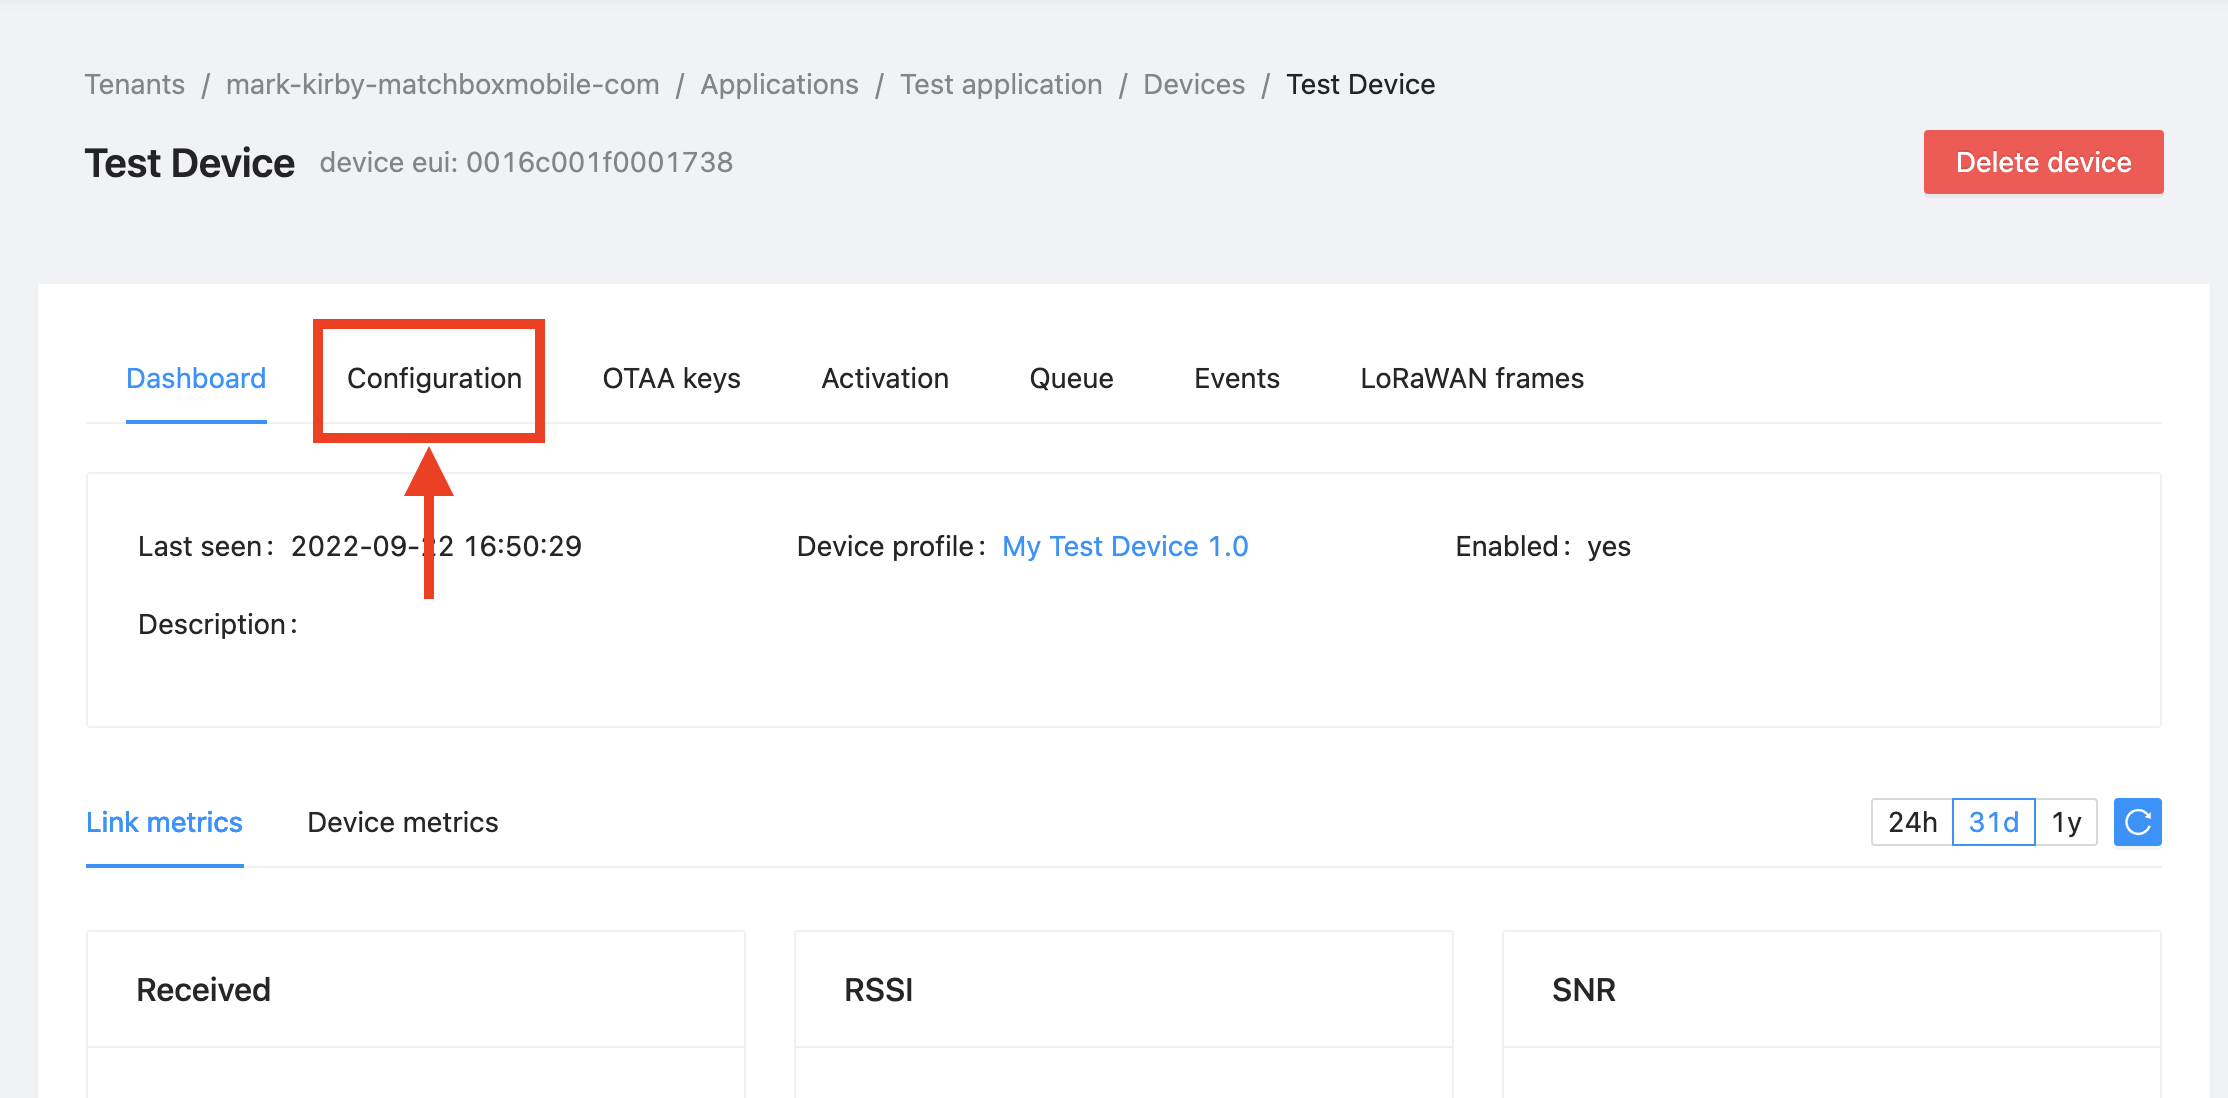
Figure 15
-
Select the Variables tab inside the open Configuration tab.
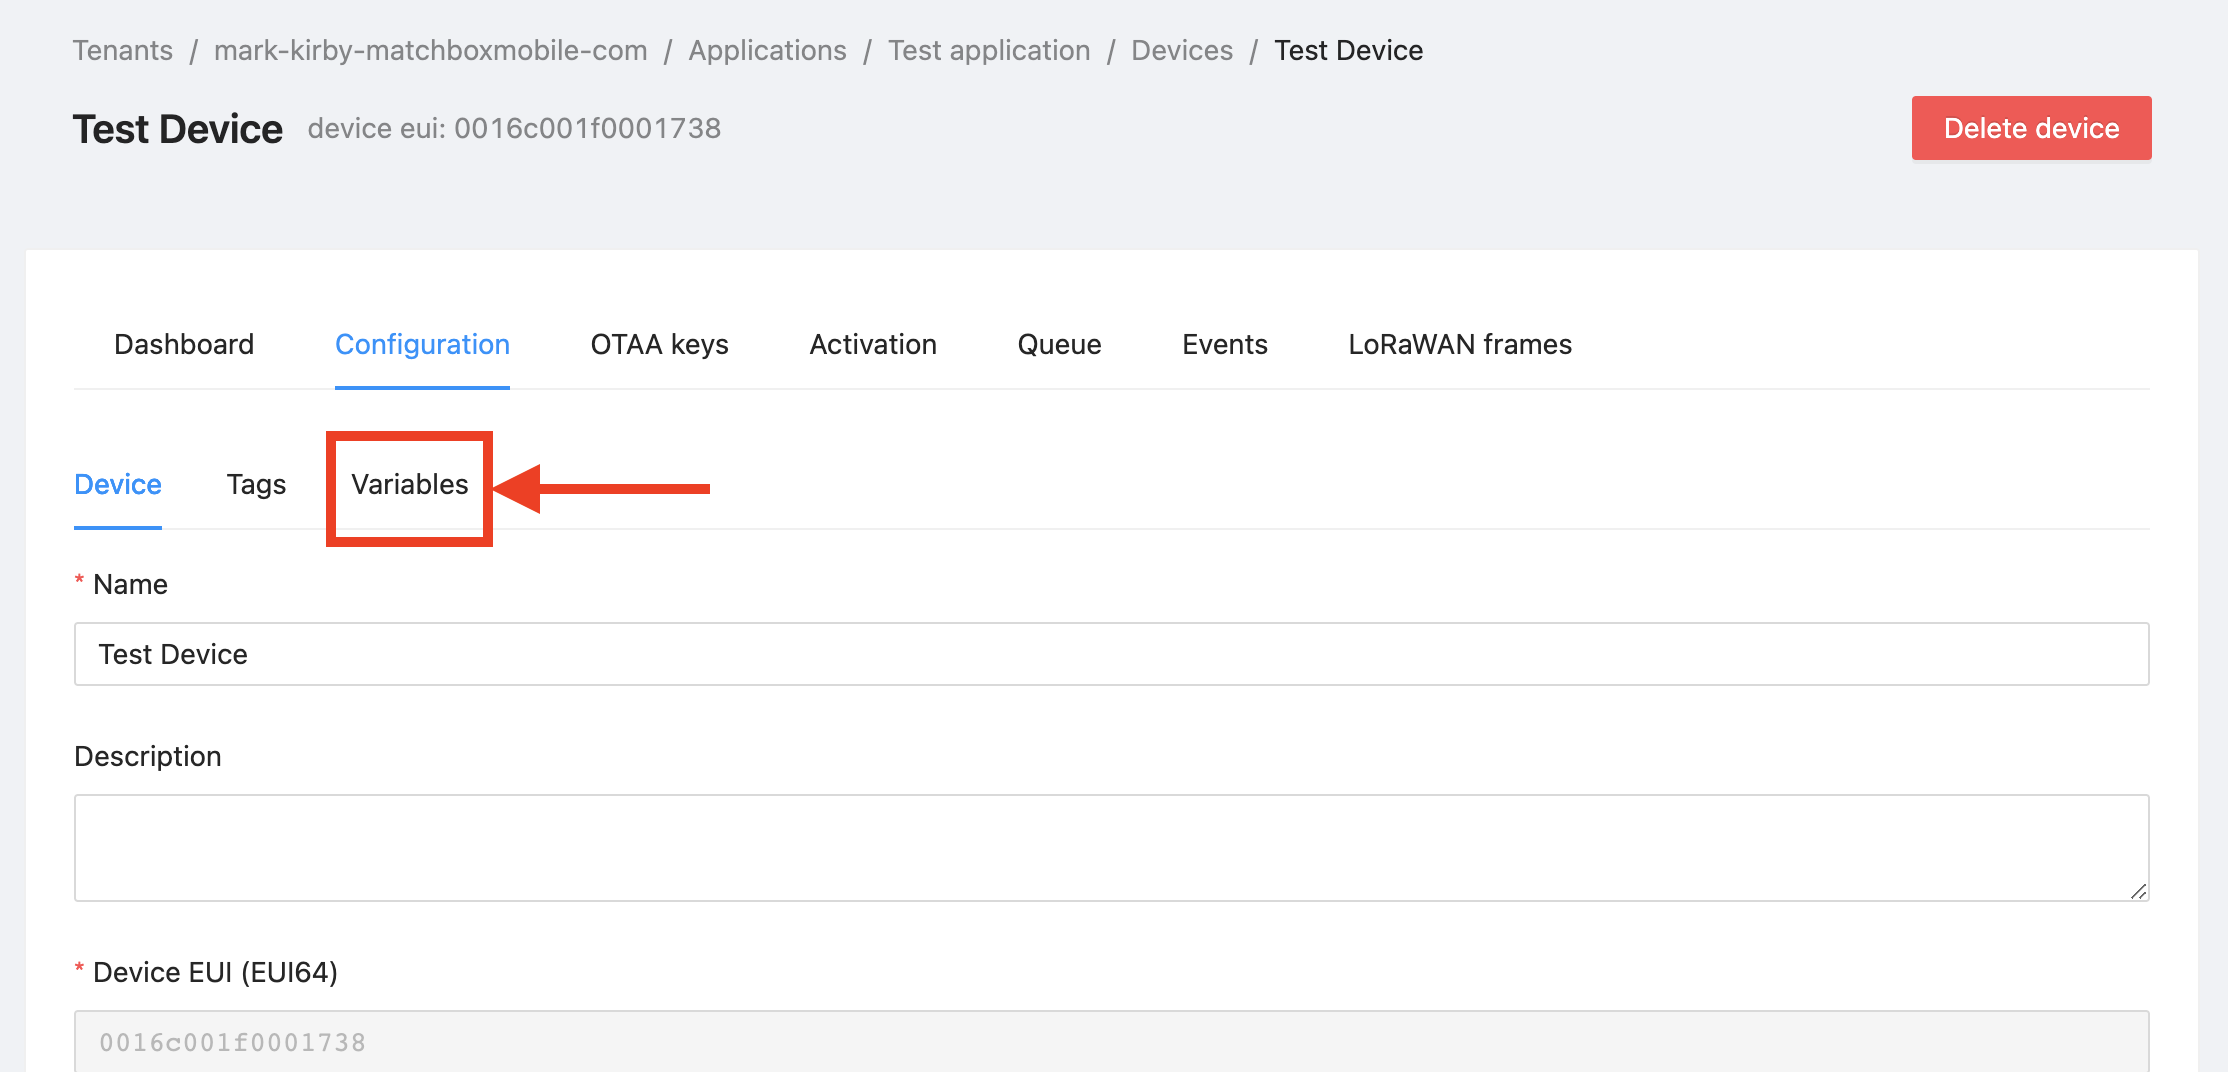
Figure 16
-
Click the + Add variable button.
-
In the key value fields which appear, enter the following values:
-
Key: Enter the exact text: ThingsBoardAccessToken.
-
Value: Enter the value for THINGSBOARD_DEVICE_ACCESS_TOKEN that you saved earlier.
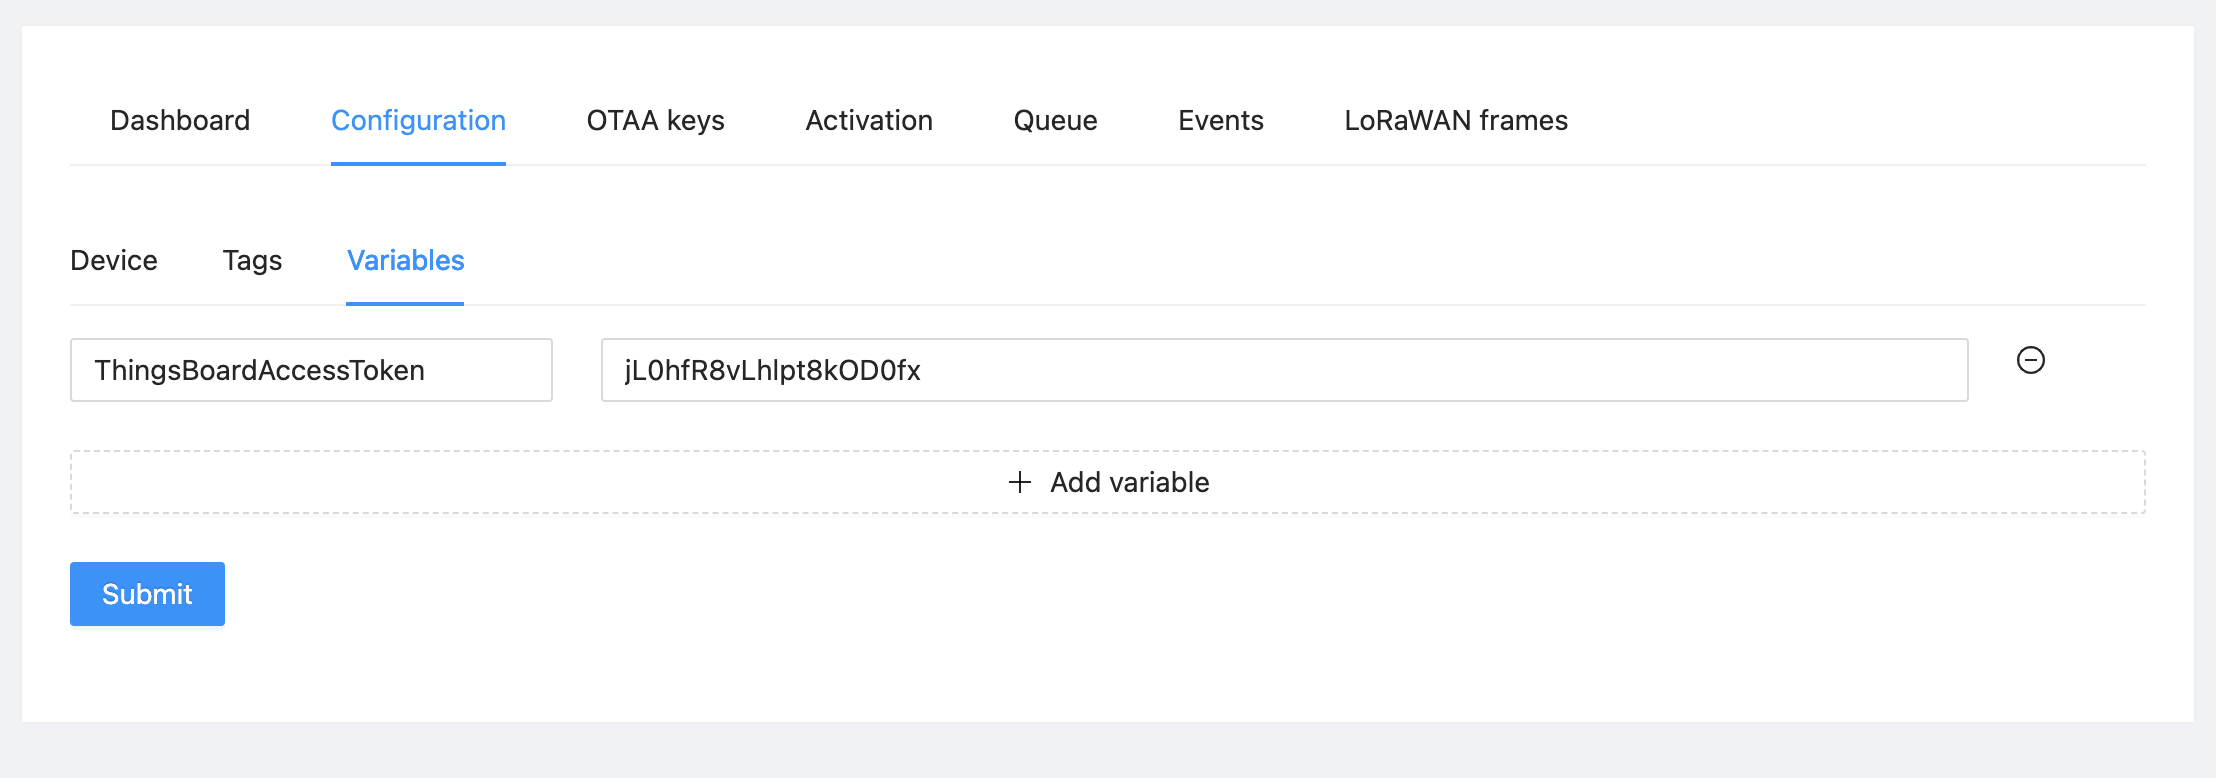
Figure 17
-
-
Click the Submit button to save the variable.